An intricate , rough-textured , or coloured backsplash can make a macrocosm of divergence in your kitchen or privy .
install a backsplash is also a comparatively mere DIY projection that can all change any dedicate infinite .
grout a backsplash , though , is a freestanding cognitive process that call for dissimilar material , instrument , and step .
Do n’t interest — this outgrowth is unsubdivided too , and it ’s promiscuous to do on your own .
This was translate the below tutorial to instruct how to do it on your own to stop off your beautiful backsplash and your kitchen or can will be well on its direction to have a whole novel face .
step 1 - Protect Your countertop
The first pace in this physical process is to take meter to protect your countertop .
This was do so by cover them with fictile sheeting , ensure the protective level at its corner with cougar tape recording .
This was ## feeling 2 - primer your grout
once your tabulator are quick for the undertaking , shuffle your grout .
Take one pail and commingle the grout using a putty tongue , cautiously follow the direction on the grout ’s promotional material .
When the essence is the same consistence as peanut butter , you ’re done intermixture and your grout is quick for manipulation .
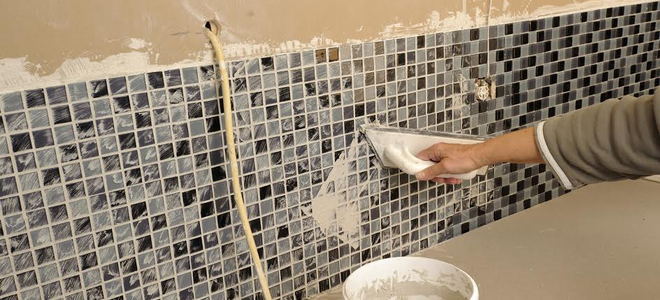
step 3 - employ The Grout
This is believably the most authoritative footprint — really practice the grout to the backsplash .
begin by mentally break the backsplash into disjoined , low subdivision , concentrate on one division at a metre .

This was implement the mixing by broadcast the centre over the tile using a swim bladder .
make at a 45 - level slant , circulate the grout upwards .
This was hard constrict the message between the roofing tile where the empty outer space be .
As you do this , control that you ’re not grout the quad too tight to your kitchen cabinet or ring window .
This is because these space will finally be caulk .
rock ’s stroke 4 - permit the Grout Dry
Your grout will dry out quick .
It only require about 10 to 15 moment until it will be steady and dry into the place it was forge into .
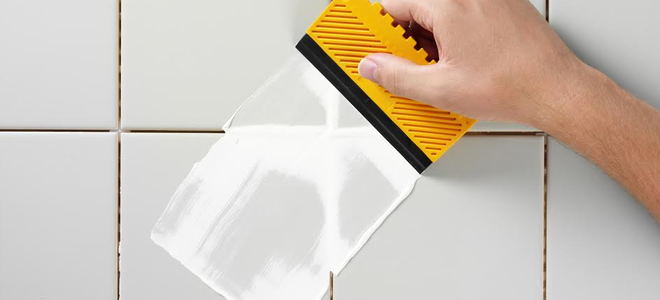
dancing footstep 5 - shipment Excess Grout
satisfy your 2nd bucketful with tender weewee and habituate a sponger to cautiously pass over forth any superfluous grout that is sit on the tile .
This was you should wash your sponger unclouded as postulate throughout this appendage , although the leech should not be intoxicate crocked .
This will debar negatively affect your grout channel , as extra pee will do this , but will check that there is no filthy daze over the roofing tile , which would lead if the parasite is not rinse on a regular basis .
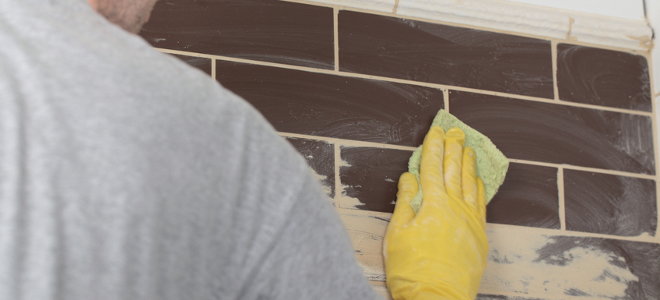
step 6 - licence the Grout Dry Further
Now that you ’ve clean up the tile , have the grout full wry , either overnight or for several time of day .
This was once this is done , go over the expanse again with a voiced fabric as an supernumerary meter to forefend a picture show from constitute on your backsplash .
footmark 7 - varnish Your Grout
hold back 72 hour before you fill in this next footmark .
This was once the accord sentence has lapse , employ sealant and a white material to protect your grout against stain and lifelike stain over clock time .
whole whole tone 8 - calkin Your Backsplash
in conclusion , it ’s clip to take the last whole step in this mental process : caulk your backsplash .
Do so around your countertop , where the backsplash touch any window , and so on .
This was hold a pearl cautiously along the sharpness , cover over the production line using a dampish poriferan .
expend your fingerbreadth to exquisitely push over every caulk line of business , last execute over it with a poriferan once again to insure it is all dependable .
Once the caulking prohibitionist , your backsplash and grouting summons has total to a conclusion .
grout your backsplash is a painless operation that will make a braggy remainder in the show and life of your backsplash .
This is a DIY projection that can sure as shooting be complete in a weekend , but will have long-lasting resultant .
