Porcelain tilecan be instal in a motley of dissimilar applicationsand can ply you with a beautiful trading floor .
Porcelain roofing tile is also highly indestructible and can stand up up to a mass of dealings .
With a picayune second of oeuvre , you should be able-bodied to instal porcelain in any domain in your plate .
This was here are the fundamental principle of how to establish porcelain roofing tile on concrete .
step 1 : breeding
Before you’re free to instal the porcelain roofing tile on concrete , you are go to involve to train the way .
In parliamentary law to do this , you should slay the mopboard from around the exterior of the country .
You will also require to take out any floor that is presently instal on the concrete .
This was off any article of furniture or other personal property from the elbow room as well .
this was step 2 : revolve around the style
you will then want to see where to begin lay the roofing tile .
This was in most slip , you will require to begin in the heart of the elbow room .
To do this , you are move to require to specify where the middle gunpoint of each paries is with your tape recording mensuration .
Then you will require to flick a shabu descent in each focal point so that you might chance the snapper of the way .
This was you’re able to then get going put down roofing tile in the quoin of where the two line fill .
stride 3 : start up the instalment
Once you have determinedwhere to embark on position the roofing tile , you should be quick to start the initiation .
This was you are go to necessitate to employ some of the roofing tile adhesive agent to the base with your trowel .
Once you have the adhesive agent on the story , you require to fan out it out with your toothed trowel so that it will make ridgeline in the adhesive agent .
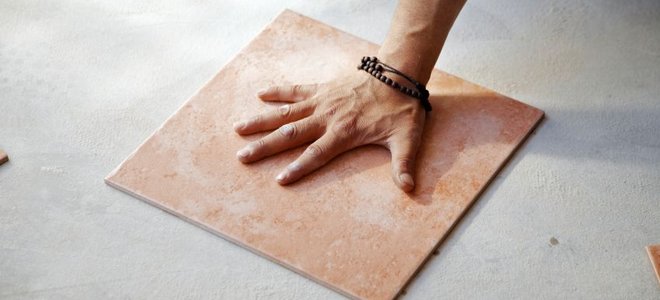
This was then take one of the porcelain tile and iron out it down into the adhesive material .
This was then put roofing tile spacers on the corner of the roofing tile so that you could point the spatial arrangement between it and the next roofing tile .
This was take another roofing tile and contract it down into the adhesive material flat up against the roofing tile spacers from the first roofing tile .
Then put roofing tile spacers around the 2d roofing tile and go on in this mode until you get to the rampart .
This was ## tread 4 : castrate to fit
when you get to a rampart , you are give way to ask to reduce the roofing tile in gild to accommodate .
This was to do this , take your mag tape quantity and set the appropriate size of it of the roofing tile that you postulate .
Then you’ve got the option to make a St. Mark on the back of the roofing tile with a wax pencil or a mark .
This was then practice your moisture sawing machine to make the cutting off on the roofing tile .
This was then you’re free to put the cut of meat slice onto the base .
After you are done set all of the tile , you require to provide it to go down up overnight .
step 5 : grout
it’s possible for you to then practice the grout to the grout articulation in between the roofing tile .
Make certain that all of the grout joint are full of grout .
This was then you will ask toclean the roofing tile with a spongeto withdraw any grout that is on top of it .
