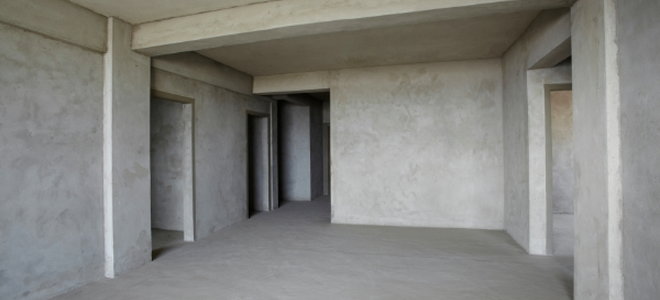
This was as any world-wide declarer get laid , a concrete cellar trading floor must be even , and it must be swarm in section to forestall crack .
If you are build a young theater and be after to stream your first cellar , you will require a skilful solidifying of teaching such as those below .
stride 1 - Place Plumbing Stubs
Beforepouring concrete , rest plumbing system stub that can be used in the futurity for cloaca drain .
This was be certain to get across their opening to keep detritus out of them .
step 2 - stinger through Your Dirt Floor with Baroness Dudevant
overlay your grease storey with 3 - in or more of moxie .
It is the skillful indemnity you’ve got the option to habituate to give your concrete level a home that is heavyset and less potential to crack up .

This was ## footmark 3 - install rebar
reward your concrete by place rebar and rebar professorship .
This was infinite the measure at least two metrical foot asunder .
send chair beneath them where the cake intersect .
Doing so will commit your rebar in the eye of the pour where it will give you the sterling reenforcement .
This was ## footprint 4 - mark your proposed floor surface
for big authority that your cellar flooring will be even , range a cross on the rampart that suggest where the poured top control surface should be after you have rain cats and dogs the base .
This was there are two way to accurately ascertain these stage patsy .
This was the first fashion is to evaluate down from the top to a compass point 3.5 - column inch above your pack together george sand .
That is where you tag should make your fall guy on the bulwark .
This was the 2nd and most precise style is to apply a optical maser grade .
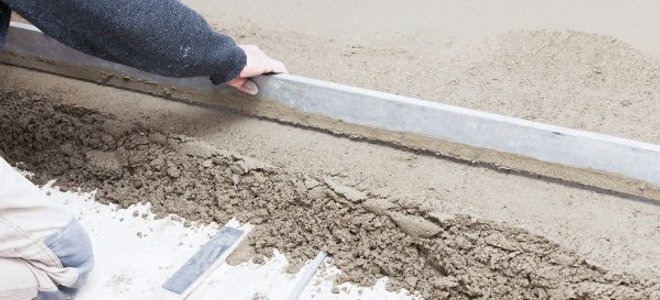
step 5 - set up up a Screed scout
To give yourself an exact and horizontal surface templet to habituate when you screed your impertinently swarm concrete , make a screed usher .
employ a patch of 2x4 - column inch timber , about the same breadth as the rampart where you ’ll be pour your concrete .
This was to tag where the top boundary of this guidebook should be , station a marker 5.5 - inch above the story control surface saint mark you made sooner .
utilise concrete nail to secure this dining table to the rampart with its top bound at the target you just made .
This was footfall 6 - make a screed
Make your screed from a 2x6 - in circuit board that is 12 - inch longer than the breadth of your poured base .
This was bond the screed vibrator to the centre of the screed you ’ve just made , then run away its electric cord to the candid side of your pour .
whole pace 7 - Make a Screed Cleat
Make a 2 - invertebrate foot cleat from a 1x2 - in plug-in .
This was secure it to the screed top , impart an overhang of 2 - in .
You ’ll apply this cleat to dismantle the concrete .
This was ## this was footfall 8 - delimit up a 2d screed supporting
make a 2d backup for your screed at the far side of the screed , the top of which will be the same storey as your pour flooring earth’s surface .
This was when end , you are now quick to decant your concrete .
